
I know there’s been many blog posts about tabbed inserts and how many companies don’t seem to make them in different styles, or even big enough size wise, so after much looking I decided to make my own.
This is not new to me, I’ve made a bunch of stuff over the years and have made tabbed inserts before, but they were on the fly and not very good. Hence, a blog post on how I made them.
I have a bunch of folders for different things that I’m doing, one is my style file. It’s a folder where I keep a bunch of magazine pages of funky looking shoes, bags, clothes and jewels as not only inspiration for making and styling, but in case I can track them down.

I have recently found a tonne of rainbow coloured J Burrows insert binders from my local Officeworks store. I don’t think anyone had ever done them in 3D ring 300 page size before as I have been buying binders for decades and never found the cover insert ones in colours. So more to come in the future weeks about other folders I’ve been making. I also bought a mega load of plastic insert sheets from Kmart. At 100 for $4 it’s relatively cheap and you can be guaranteed that they will all be the same size as insert pages are all made differently and I had that issue in several folders but have fixed it with the Kmart inserts.
For my Style File I simply used a magazine page for the cover insert. For the inserts, I used a bunch of coloured manilla folders. At .72 cents each, also from Officeworks, they’re cheaper if you buy more than ten, and they come in great colours that I love and use. I bought two of each.

I measured the width of my plastic sleeve inserts and they came to 21.8 cms. I then measured from the edge of the manilla folder and marked it at 21.8cm. I did that top and bottom and ruled a line down the side. You can get two out of one folder so be careful how you cut. I did it on the back and front of the folder to get two single inserts.

Next I slipped each piece into a plastic insert page to see if it fit well. They did.

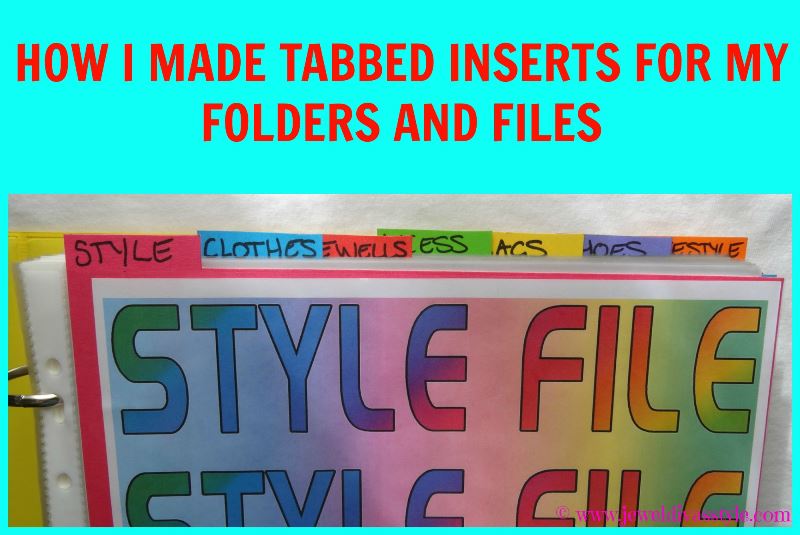
When it did, I made a pencil line across the top where the plastic page ended and decided on how many tabbed inserts I was going to need. I decided which colour order they would go in and divided that number by how many cms I could make the tab, after dividing it into 21.8cm of course, and I made each tab 1 cm high as seen below with my pencil marks. I carefully cut off the cardboard I didn’t need and was left with my tabs, as shown on the pink one below.

After deciding which section would come first in the folder, I used a Sharpie to write them out. This is what I ended up with.

Fill up your pages and your folder. You can do this for many more folders and I have a bunch of them which I’ll show you in the coming weeks, including an internet/blogging planner I started after seeing them online. I figured I needed one with the amount of stuff I do on the web.
If you love making things this is an awesome and cheap project. The folder cost $5.99, the manilla folders were $6.88 after the 10% was taken off for buying more than ten. 300 insert sheets cost $4 from Kmart. All it takes is a bit of time and patience cutting them out.
I like the idea of keeping clippings of magazine pages you like. This way later you can go out and find the stuff that sparks your style. I just have my pages lying around. I am going put this method to use.